The following pages explain some common functions found across the search pages.
From here you can find out about:
Column Filters
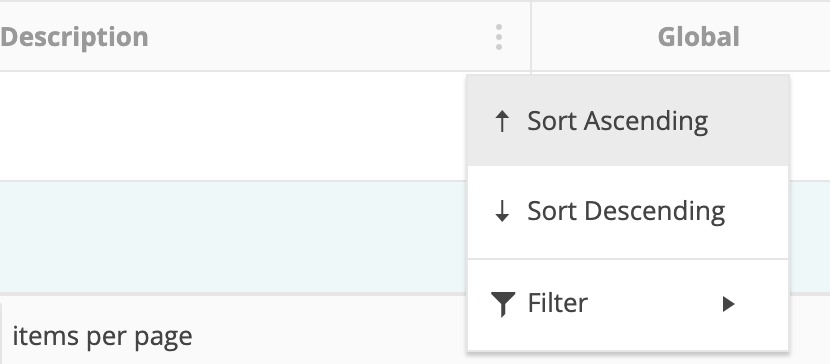
To filter records click the ![]() button next to the column header and then select the Filter option. For example, if you wanted to filter a list of contacts by Surname you could click the
button next to the column header and then select the Filter option. For example, if you wanted to filter a list of contacts by Surname you could click the ![]() button next to Surname.
button next to Surname.

After selecting the Filter option, this will generate the drop down menu shown below; from here you will be able to use a more advanced filter to narrow down your search.
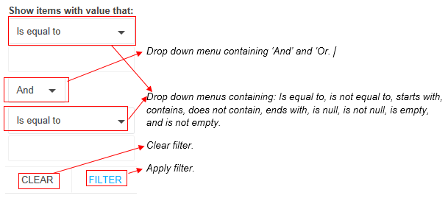
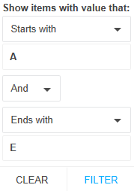
Use the drop down menus to define your search. For example, you may wish to search for a record that starts with the letter A AND ends with the letter E; in this case you would fill in the search filter as shown below.
Clicking on ‘Clear’ will take you back to the record list, clicking on ‘Filter’ will apply your search criteria and generate the results in the record table.
Custom Filters
Custom filters allow you to make more detailed searches; these are expandable & collapsible using the filter symbol. Clicking  will open the search box shown below.
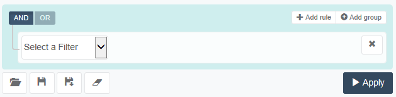
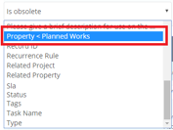
To apply a filter select an option from the drop down noted by “Select a Filter”. This will provide a list of options by which to narrow down your search. The option selected will determine which further search criteria can be specified; these are detailed below.
|
Filter Type |
Options |
|
Text |
Is equal to, is not equal to, in, not in, begins with, doesn’t begin with, contains, doesn’t contain, ends with, doesn’t end with, is empty, is not empty, is null, is not null |
|
Numerical |
Equal, is not equal, in, not in, greater, greater or equal, less, less or equal, between, null, is not null |
|
Dropdown |
In, not in, is null, is not null |
|
Date |
Equal, is not equal, greater, greater or equal, less, less or equal, between, null, is not null |
Multiple rules can be added to build an advanced set of filters.
There are two options for adding filters:
Add Rule - A single rule is added to the set of filters as shown below. The rules are either applied as an AND or an OR filter based on the option in the top left corner of the box.
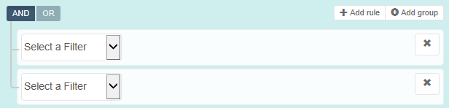
Add Group - A new sub group of rules is added to the list of filters as shown in the box below. Further rules can be added to the group or a further sub group using the buttons which appear at the top of the subsection.
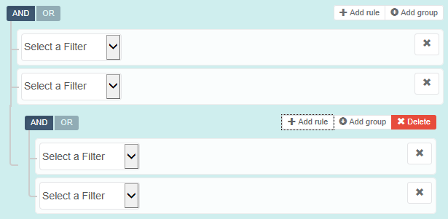
Individual rules can be deleted by clicking the cross next to the rule. Groups can be deleted by clicking the ‘Delete’ button above the group you wish to delete.
If you wish to start again, click the clear button  to clear the filter.
Once you have finished creating your custom filter, click ‘Apply’ to filter the search. The results will be populated in the search table.
User Defined Fields (UDFs) can be marked as Protected which means that certain users are restricted from seeing them. If a user is prevented from viewing protected UDFs on a record they will also be unable to view them on Custom Filters.
If you select to filter by UDFs, you can see the UDF path. This allows you to see which widget the UDF belongs to helping you identify the relevant UDF quicker.
Saving & Loading Filters
Once you have created a filter you will have the option to save it for future use. To do this you can click on the ‘Save’ button  or on the ‘Save As’ button
 . Clicking on the ‘Save As’ button will open the box shown below. You may wish to save filters if they are particularly complex, saving the filter will make it easier to search for the same criteria at a later date.
From here you will be able to give your filter a title and a description so that you can find it at a later date. To save the filter click on ‘Save filter’; to cancel saving the filter click on ‘Close’ and this will return you to the custom filter search.
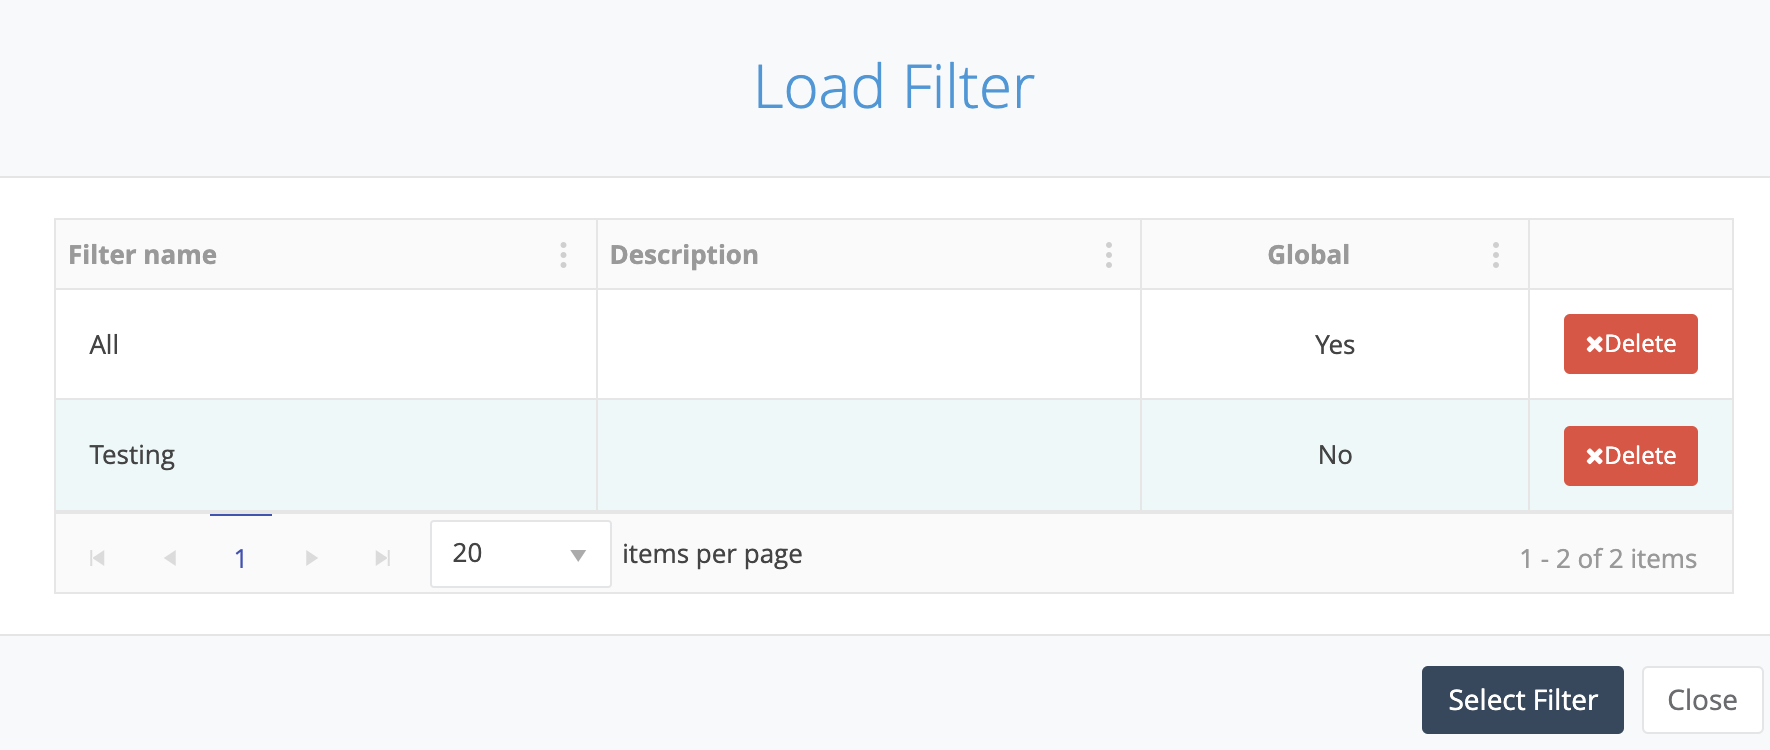
To use a previously saved filter click on the ‘Load’ button , this will open the box shown below.
From here you will be able to select a filter to use. Click on the filter that you wish to apply and then click ‘Select Filter’; this will populate the search criteria in the custom filter box and allow you to apply it to your selected library.
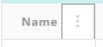
You can filter your search results using the![]() button next to each search criteria. For example, if you wanted to filter by Name you would click the
button next to each search criteria. For example, if you wanted to filter by Name you would click the ![]() button next to the Name column header.
button next to the Name column header.
Clicking this will open the drop down menu shown below.
To delete a saved filter click on the ‘Delete’ button next to the filter.
User Defined Columns- UDC
User defined columns are found on the Property, Asset and Project search pages. These columns allow you to view linked record data such as how many Tasks have been raised against a Property.
To add a UDC click on the  button in the top right corner of the search page, this will open the popup shown below.
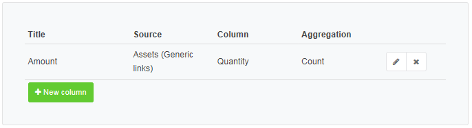
This allows you to add a new UDC, and manage your existing UDCs. To create a new UDC click “+ New column” and then fill in the details shown below:

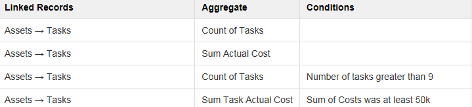
Some examples of how you can utilise the UDC are;
A filter can be applied to the information in this column by clicking on the  button; for more information on this function see Custom Filters.
Once you have filled in the required details click the  button to save your UDC. Note that the column will not be immediately added to the search page, it must first be selected from the list of columns. For more information on this function see Manage Search View.
Once the UDC has been created it can be edited at a later date by using the  button.
To delete the UDC click the  button next to the UDC that you wish to delete.
Managing Search View
Each search page allows you to select which columns you would like to display; you can select any standard field that appears on a record as well as any User Defined Fields (UDFs) that have been added.
To select the columns to display select  at the top of the search window.
This will open another window, from here you can select (or deselect) the required columns; an example is shown below.
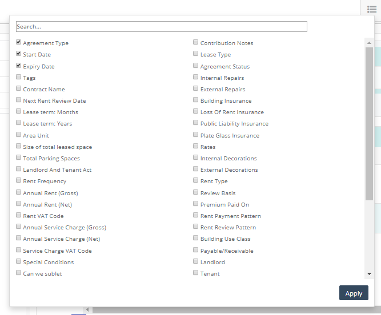
Simply select the columns that you wish to display by clicking the check box next to the column name, and deselect the columns that you do not wish to display. There is no limit to the number of columns that can be displayed on the search page, but adding many columns may cause a delay in loading the search page. Once you're happy with your selection then click ![]()
Users can also select every column by using the select all checkbox at the top left of the list
Reorder Columns
After selecting which columns should be displayed you will have the option to reorder them; simply drag and drop the column header to its new position on the search page. There are arrows to indicate where the new column will be moved to; an example is shown below.
Lock Columns
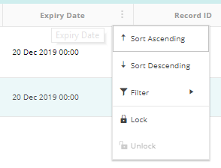
On each search page there is the option to lock columns; this will pin the column to the left hand side of the search table allowing you to scroll across the page whilst keeping this column in view. Several columns can be locked at once, but all will appear on the left hand side of the screen. To lock or unlock a column simply click on the three lines next to the column header and then select the appropriate option.
Save Search Settings
Each time you open a search page it will display the last search parameters that were used to filter the records on that page. For example, if you filtered the Project Search page to only show projects between a specific date range, the next time that you opened this page the filter would be automatically applied to display your preferred settings. The column order and sizes will also be preserved.
If a column filter has been used it will be indicated by a square box around the column header such as in the example shown below.
If a Custom Filter has been used it will be indicated by a coloured filter icon  .
.
Reset Filters
You can return to the default view on a search page by clicking the Reset Filters option  ; this will remove all column and custom filters, and restore any default search filters such as hiding obsolete records.
Tooltip on Column Headers
If a column header does not display the full title you will be able to view it by hovering over the name of the column; the full name will then be displayed in a tooltip.
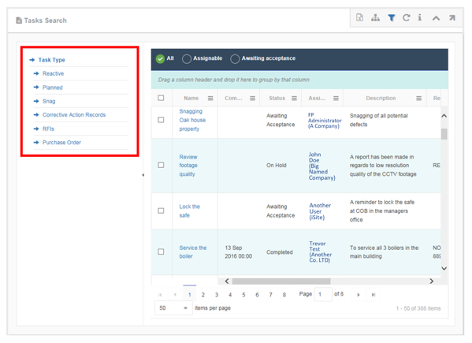
UDF Classification Filter
A UDF Classification filter has been added to each search page; this allows you to search for specific UDFs depending on the classification that has been selected. For example, if the task type of Reactive was selected then only UDFs specific to this type would be available to search on.
This filter can be hidden from view by clicking the  button; this will expand the width of the search page allowing you to view additional data.
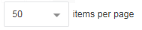
Select Number of Records
On each search page, you have the option to select the number of records that you wish to appear per page. The default number of records generated is set to 50 but this can be increased to 75, 100, 150 or 200 records by selecting a number from the dropdown menu shown below.